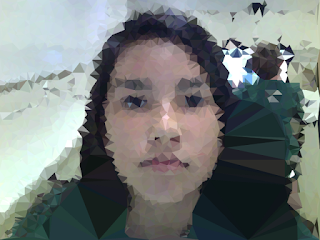
 To start, the first thing I did was take my portrait picture on Photo Booth. Next, I went to File>Open and opened my portrait picture to Photo Shop making sure it was an 8.5 by 11 inch canvas size. I made sure it included the top of my head and the bottom of my chin. I then selected the crop tool to crop my image so it was symmetrical and equally spaced. I also inserted a graph to help me find my line of symmetry. I made sure to lock my "portrait" layer so it wouldn't move. Next, I went to Image>Adjustments>Levels and made it to auto. I made a new layer called "outline" and selected the line tool. We decided to make the lines the color red so it was easier to see. The next step was to outline different parts of my face on only the left side. In all those outlines, we were to create triangles. One thing I had to keep in mind was to make bigger triangles on bigger areas of my face and smaller triangles on more detailed parts like my eyes. Once I was done making triangles on each part of my face I clicked on the first shape layer and went all the way down to the last layer while holding down shift. Each part had it's own layer like your eyes, nose, hair, lips, ears, and skin. Next, I made a new layer named "Low Poly". I selected the polygonal lasso tool and outlined each triangle. I went to Filter>Blur>Average to create the affect in each triangle. I continued to outline each triangle on my face and used command F to apply what I just selected on to all of the triangles to make the process faster. Next, I used the Polygonal lasso tool and outlined just the left side of my face. I pressed command J twice to make two copies of the cut outs. One layer was called "left side" and the other one "right side". I clicked on the move tool and dragged the left side of my face to fit the other half of my face. I double clicked the "outline" layer and made the lines white instead of red. Finally, I made my background white and saved the finish product.
In my opinion, my Poly-1 and Poly-2 images are very different. My Poly-1 image is a profile of myself on the left and my second one is of my sister named Myranda which is on the right. My Poly-1 image is a bit more basic because it is the first one we did. For my Poly-1, I would improve on the sizing of triangles because I think I could've made bigger triangles on my face and hair. I also would have worked on my nose to make it look more realistic by putting less triangles. On the other hand my Poly-2 image is more vibrant and eye-catching. Personally, I like my second image better because like I said it is more clear and has a lot of contrast. I also like how my sister's face looks more realistic. For my Poly-2 image I would improve on making smaller triangles on her chin instead of one big one. Lastly, I would make her hand more obvious. To conclude, this project was not the easiest but I'm glad I got to try something new and get through it.


